Pages

Friday, March 23, 2012

How create a virtual machine on Oracle VM 3.0.3: step 6

Click here for previous steps:
step 1
step 2
step 3
step 4
step 5

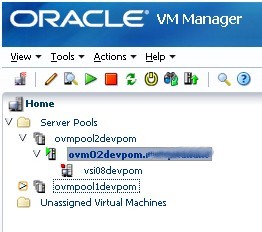
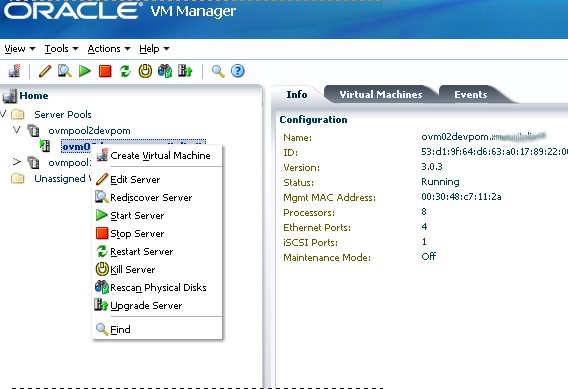
Before reboot your machine you need to modify the boot order options of your machine. So on Oracle VM Manager console, right click on your machine and select "Edit"
 On Boot Order tab change the following configuration (Boot Order: Networking)


with the following one (Boot Order: Disk). And click OK

An error message will be prompted because the machine is not stopped and those changes have to be done while the machine is completely halted.

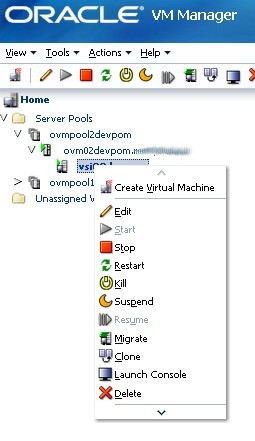
From the Oracle VM Manager console right click on your machine and select "Stop". Click OK on the Confirmation window.


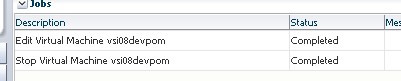
A new job will start attempting to stop your virtual machine


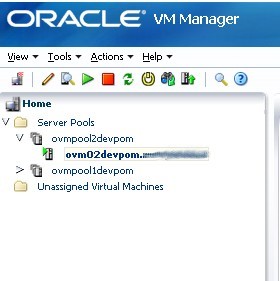
and when successfully stopped your job will have a "completed" status


Now "Edit" again your machine and change your "Boot order" option to boot on Disk


Again a new job will start and complete


Start again your virtual machine (a new job again)


and try to connect using the vnc console.


A login prompt is waiting for you.


That's all.

How create a virtual machine on Oracle VM 3.0.3: step 5

Click here for previous steps:
step 1
step 2
step 3
step 4

Select your boot loader configuration

Enter your kernel boot options here if you need them

Choose a password if you need it

Simply select OK and go next

Install the boot loader into the Master Boot Record

Choose YES to configure your eth0 network interface

I need to activate on boot my network interface and enable the IPv4 support.

Choose "Manual address configuration" and enter your static ip address and your netmask

Enter your gateway, primary and secondary dns

Enter your machine hostname

Select your time zone (mine is Europe/Rome)

Finally choose your root password

Install the default ORACLE Linux Server packages.

Your installation will be logged in /root/install.log

Just wait for the installation to complete and when asked reboot your machine you have first to follow the step 6 (How create a virtual machine on Oracle VM 3.0.3: step 6). After complete those steps you can reboot.


Thursday, March 22, 2012

How create a virtual machine on Oracle VM 3.0.3: step 4

Click here for previous steps:
step 1
step 2
step 3


Choose HTTP as Installation Method

Then enable IPv4 support to configure TCP/IP

and manully configure your IPv4 address.

Select where is your http website and write the directory where you have "unzipped" your iso

Welcome screen

Warning

I removed all partition and created a default layout

Confirm you want to remove previous partitions

Click yes if you want to modify the partition layout.

The default layout

It will continue on next step

Friday, March 16, 2012

How create a virtual machine on Oracle VM 3.0.3: step 3

Click here for previous steps:
step 1
step 2


As boot option select only network, while on the Network Boot Path type your http server (you can use also an ftp server as you prefer) were you have unzipped your distribution (in my case it was Oracle Enterprise Linux 5 update 7 x86_64). Clicking on Finish button
.. you can see a job is submitted and its status will complete soon.
Now as you can see you have a virtual machine available on you server pool (with still nothing inside). Select that virtual machine and then press the green play button

A new job will start
And after it completes...
... you can right click on virtual machine and select "Launch Console" icon
A jnlp will be downloaded (called ovm_rasproxy-ws.jnlp). Just open it and ...
... it will lauch your vnc session. Those steps worked for me only on a Windows machine after I've updated my Java installation to the last available (Version 6 Update 31 in my case), after I have installed UltraVNC free edition and only using Chrome browser (it failed on IE7 and 8). Just select your language.
Select your keyboard type

It will continue on next step.

Thursday, March 15, 2012

How create a virtual machine on Oracle VM 3.0.3: step 2

Click here for previous steps:
step 1


To create a new virtual machine just connect to your Oracle VM Manager (http://hostname:7001/ovm/console) and select your Server Pool

On my server pool I have only a server machine
Right click on it and select "Create Virtual Machine"
On the following window choose a name of your virtual machine, the operating system and the Domain Type (just as described on previous step).
It's suggested to insert the same values for Max Memory and Memory (as I did not at that time) because as stated on Oracle VM (Release Notes for 3.0.3) http://docs.oracle.com/cd/E26996_01/e18546.pdf pag.12 you can incur into kernel panic problems.
HVM Guest Kernel Panic
HVM virtual machines with Linux, Solaris or Windows guest operating system may experience kernel panic  when the virtual machine is stopped and started several times.
Workaround: Set the Maximum Memory and the Memory fields to the same value in the Create/Edit  Virtual Machine wizard.

On Setup Networks just choose one of previously created VNIC (Tools->VNIC menu')
Create a virtual disk with desired space. In my case it was 50GB.
On the next screen my installation did't run if I selected this previously uploaded iso from the repository. So I didn't check any of them.
As virtual disk check that one you have created
I had not any storage to select.
Select this "Setup Disk Order"

It will continue in the next step