Let's continue setting up the system requirement for our Oracle Database 10g installation.
First of all we have to edit the /etc/sysctl.conf file, so type
vi /etc/sysctl.confand then add the following lines:
kernel.shmall = 2097152Now we have to permanently change the current kernel parameters so we have to issue the following command:
kernel.shmmax = 2147483648
kernel.shmmni = 4096
# semaphores: semmsl, semmns, semopm, semmni
kernel.sem = 250 32000 100 128
fs.file-max = 65536
net.ipv4.ip_local_port_range = 1024 65000
net.core.rmem_default=262144
net.core.rmem_max=262144
net.core.wmem_default=262144
net.core.wmem_max=262144
/sbin/sysctl -pAdd the following lines to the /etc/security/limits.conf file:
* soft nproc 2047Add the following line to the /etc/pam.d/login file, if it does not already exist:
* hard nproc 16384
* soft nofile 1024
* hard nofile 65536
session required /lib/security/pam_limits.soSome packages are required for Oracle Database 10g setup. Issue the following commands to see which versions of these packages are installed on our system:
rpm -q binutils compat-db control-center gcc gcc-c++ glibc glibc-common gnome-libs libstdc++ libstdc++-devel make pdksh sysstat xscreensaver openmotif21 libaioMount Enterprise-R4-U4-i386-disc3.iso into vmWare's CDROM device and then type:
cd /media/cdrom/Enterprise/RPMSIssue the following commands as root user to create the Linux groups and user account that will be used to install and maintain the Oracle Database 10g software. The user account will be called oracle, and the groups will be oinstall and dba.
rpm -Uvh libaio-0*
rpm -Uvh openmotif21*
/usr/sbin/groupadd oinstallThen set the password for the oracle account:
/usr/sbin/groupadd dba
/usr/sbin/useradd -m -g oinstall -G dba -s /bin/ksh oracle
passwd oracleI will use oracle/oracle :)
Issue the following commands to create the directories in which the Oracle software will be installed:
mkdir -p /u01/app/oracleAdd at the end of the /etc/profile file the following command:
chown -R oracle.oinstall /u01
chmod -R 775 /u01
if [ \$USER = "oracle" ]; thenAdd at the end of the /etc/csh.login file the following command:
if [ \$SHELL = "/bin/ksh" ]; then
ulimit -p 16384
ulimit -n 65536
else
ulimit -u 16384 -n 65536
fi
umask 022
fi
if ( \$USER == "oracle" ) thenType vi /home/oracle/.profile after logged in as oracle user and add the following lines at the end of the file:
limit maxproc 16384
limit descriptors 65536
umask 022
endif
# Oracle SettingsAlways as oracle user type:
export ORACLE_SID=primary
export ORACLE_BASE=/u01/app/oracle
export ORACLE_HOME=$ORACLE_BASE/product/10.2.0/db_1
export LD_LIBRARY_PATH=$ORACLE_HOME/lib
export PATH=$ORACLE_HOME/bin:/bin:
/usr/bin:/usr/sbin:/usr/local/bin:/usr/X11R6/bin
umask 022
mkdir -p $ORACLE_BASE/adminIn the next step I will install the Oracle Database 10g, but before I would like to physically copy this machine to another locations.
mkdir -p $ORACLE_HOME
This is useful because it is a faster way to create another Linux environments and another virtual machine that will be part of a future Data Guard configuration as standby database.
I created the primary database on the directory C:\EnterpriseLinux_Data, so create another directory (C:\EnterpriseLinux_Guard) and copy and paste all the files from C:\EnterpriseLinux_Data directory into C:\EnterpriseLinux_Guard directory
Now from your vmWare GSX server select File->Open Virtual Machine and then click on Browse button to add your future standby database (I selected the file C:\EnterpriseLinux_Guard\rhel4.vmx). Then click on Edit virtual machine settings and change the name of this "standby database" machine in guard.
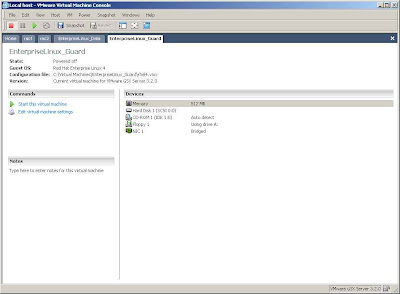
At this point you will see two tabs on your vmWare GSX server, data and guard: now this time start the "standby database" machine (guard). The first time you will be asked if create a new identifier for this machine... You have to create a new identifier.
Finally you have to see a figure like this below.

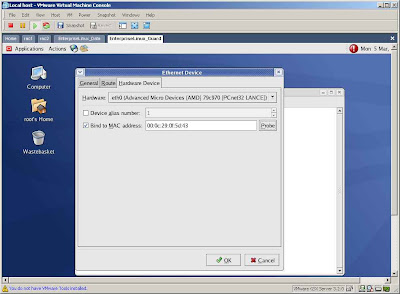
You will see while your "standby database" machine is starting that a MAC address misconfiguration is detected: this is because you have to probe for new MAC address using system-config-network tool from a root terminal.
So as root user type on your terminal system-config-network and for each network device check for a new MAC address (see the figure below).

Change also your hostname from data.dataguard.com to guard.dataguard.com.
vi /etc/hostsSave your network configuration and type
/etc/init.d/network restartType
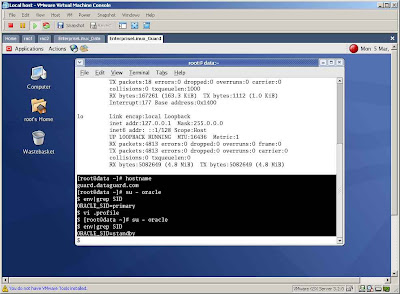
hostnameto see if you have written the right hostname for your "standby database" machine (you should see guard.dataguard.com).
Login as oracle user (su - oracle) and edit your .profile file, changing the ORACLE_SID variable in standby (see the figure below).

Click here to read the next step.
No comments:
Post a Comment