So, in particular, this machine will be referred to as the primary database of the Data Guard configuration. In a second time I will configure another virtual machine to be used as standby database, a transactionally consistent copy of the primary database. In both these machines I will use Oracle Unbreakable Enterprise Linux: it's important to remember that all members of a Data Guard configuration must run an Oracle image that is built for the same platform. This means, I cannot have a primary database configured on a 32-bit Linux system and a standby database on a 32-bit Windows system.
So let's start with the new installation...
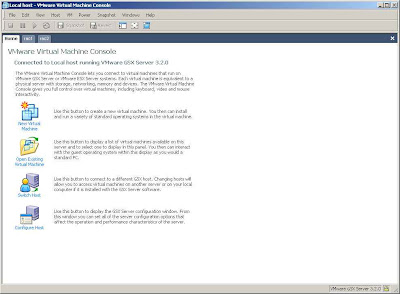
Select New Virtual Machine (see the figure below) and then click NEXT.
Select Custom as Virtual machine configuration and then click NEXT.
Select Linux as Guest operating system and Red Hat Enterprise Linux 4 as Version and then click NEXT.
Give a name to your virtual machine (I typed EnterpriseLinux_Data, because in a second moment this machine will be part of an Oracle Data Guard configuration, so stay tuned),
select your preferred location and then click NEXT.
Click NEXT from the Set Access Rights screen and then again, click NEXT, from Startup / Shutdown Options screen.
Specify 512 as Memory and then click NEXT.
Select Use bridged networking as Network Connection and then click NEXT.
Select SCSI Adapter LSI Logic as I/0 and then click NEXT.
Select Create a new virtual disk from Select a Disk screen and then click NEXT.
Select SCSI (Recommended) as Virtual Disk Type and then click NEXT.
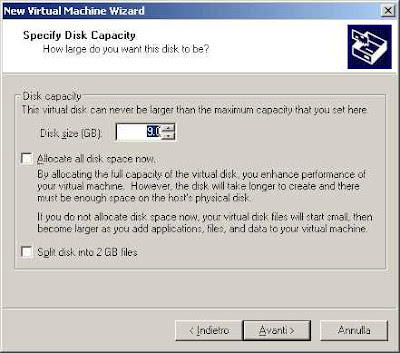
Specify 9GB as Disk Size, deselect Allocate all disk space now (see the figure below) and then click NEXT.
Specify where to save your virtual files, give them a name (I used C:\EnterpriseLinux_Data\EnterpriseLinux_Data.vmdk) and then click NEXT.
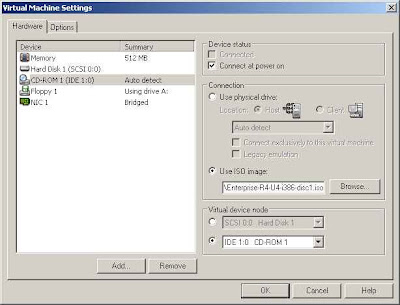
From the VMware Vitrual Machine Console, click on Edit virtual machine settings and edit your CDROM configuration to read your Oracle Enterprise Unbreakable Linux iso image (Enterprise-R4-U4-i386-disc1.iso) during the start up. Now we are ready to start our machine and to begin the installation of the first image Enterprise-R4-U4-i386-disc1.iso of Oracle Enterprise Unbreakable Linux release.
At the boot screen.. simply press ENTER
Then choose Skip to skip the media test (you should have Enterprise-R4-U4-i386-disc1.iso, Enterprise-R4-U4-i386-disc2.iso, Enterprise-R4-U4-i386-disc3.iso and Enterprise-R4-U4-i386-disc4.iso image)
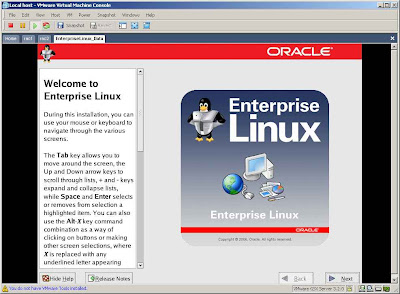
From the Welcome screen (see the figure below) click on the NEXT button.
Select your installation language and then click NEXT.
Select your Keyboard Configuration and then click NEXT.
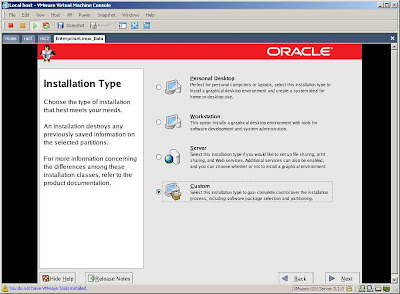
Select Custom as Installation Type (see the figure below) and then click NEXT.
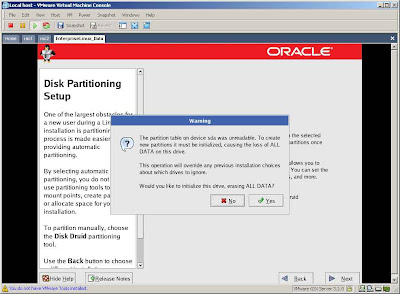
Select Manually partition with Disk Druid as Disk Partitioning Setup and then click NEXT.
When the Warning is showed click on the YES button.
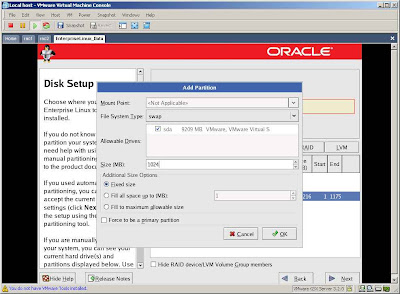
For simplicity I will just add a root partition and a swap partition.
Select the New button, select swap as File System Type, type 1024 as Size (see the figure below) and clik OK.
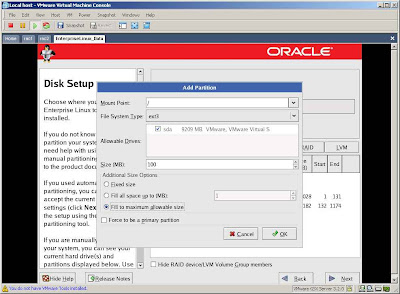
Select again the New button, select ext3 as File System Type, select / as Mount Point,
check Fill to maximum allowable size (see the figure below) and clik OK.
Click NEXT from Disk Setup screen.
Click NEXT from Boot Loader Configuration screen.
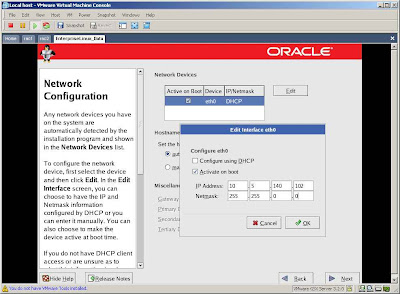
Select Edit from Network Configuration screen and type your static IP (see the figure below) or if you have a DHCP, select Configure using DHCP. Then click OK.
Because I use a static IP I should select an hostname for this machine. I will use data.dataguard.com (see the figure below).
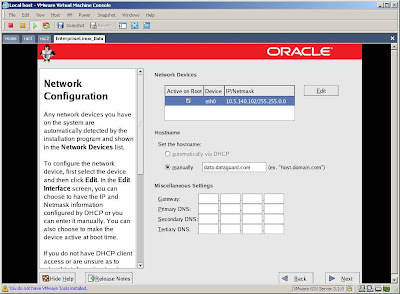
Type your Gateway and DNS settings if you have it and then click NEXT.
Disable the firewall and enable SELinux and then click NEXT.
Click on Proceed button.
Select your default language and then click NEXT.
Select your Time Zone and then click NEXT.
Type your root password and then click NEXT.
Select from the Package Group Selection:
* X Window System
* GNOME Desktop Environment
* Editors (I have selected the vi editor)
* Graphical Internet
* Sound and Video
* Server Configuration Tools
* FTP Server
* Legacy Network Server(rsh-server and telnet-server must be selected)
* Development Tools
* Legacy Software Development
* Administration Tools
* Give attention to the System Tools:
Select oracleasm-2.6.9-42.0.0.0.1EL (uniprocessor) for UP kernel or select oracleasm-2.6.9-42.0.0.0.1ELsmp for SMP (symmetric multiprocessor) kernel.
Then select sysstat because this package contains utilities to monitor system performance and usage activity such as iostat (CPU statistics and input/output statistics for devices, partitions and network filesystems) and sar (it collects, reports and saves system activity information).
and then click NEXT.
From the About to Install click NEXT and then the Continue button.
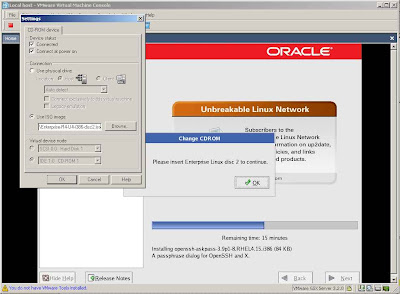
When asked, insert the disk 2 (Enterprise-R4-U4-i386-disc2.iso) editing your CDROM settings (see the figure below) and then click OK.
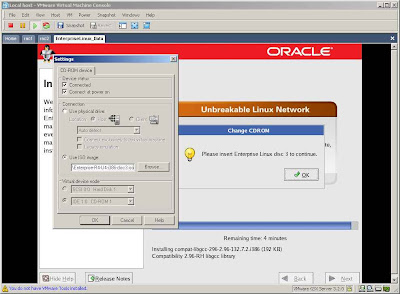
When asked, insert the disk 3 (Enterprise-R4-U4-i386-disc3.iso) editing your CDROM settings again (see the figure below) and then click OK.
When the installation is completed disconnect your CDROM (see the figure below) and then click the Reboot button.
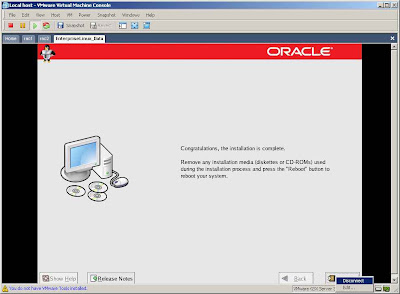
Your machine will reboot.
On the Welcome screen click the NEXT button.
Select Yes, I agree to the License Agreement and then click the NEXT button.
Set your Time and Date and then click the NEXT button.
On the Display screen select Configure and then set the model of your monitor (see the figure below)
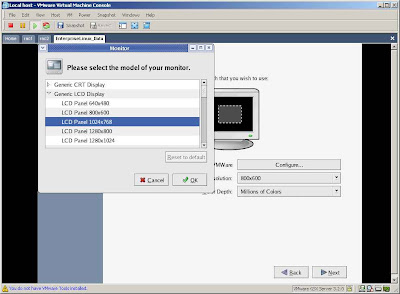
Then eventually change your Resolution (see the figure below) and then click the NEXT button.
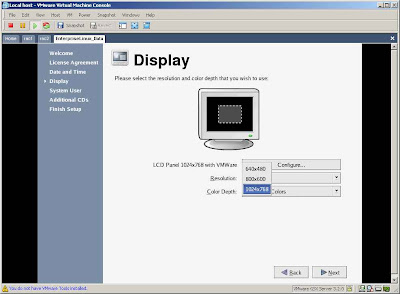
I won't add a System User as suggested, so after click on the NEXT button, click also on the Continue button showed by the Warning window.
Click NEXT on Additional CDs and NEXT again on Finish Setup screen.
Login as root and next time I will start to install again the Oracle Database 10g, after have prepared the right Oracle environment.
Click here for the next step.
11 comments:
Excellent instructions ! Thanks.
You're welcome :)))
Hello! I could have sworn I've visited this blog before but after going through many of the articles I realized it's new to me.
Anyhow, I'm certainly pleased I stumbled upon it and I'll be bookmarking it and checking back regularly!
Also visit my blog porn star exotica
Very nice post. I just stumbled upon your weblog and wished to say that I've really enjoyed browsing your blog posts. After all I will be subscribing to your feed and I'm hoping you write again soon!
Take a look at my website ... black porn star caramel
Normally I don't learn article on blogs, but I wish to say that this write-up very pressured me to take a look at and do it! Your writing style has been amazed me. Thanks, quite nice article.
My webpage :: teen porn
It's an awesome article in support of all the web viewers; they will obtain advantage from it I am sure.
Also see my page - xxx video fix
Hello i am kavin, its my first occasion to commenting anywhere, when i read this post i thought i
could also make comment due to this brilliant piece of writing.
Also see my page: Orlando Fl contractor
You are so awesome! I do not suppose I've truly read through something like that before. So wonderful to find another person with unique thoughts on this subject. Seriously.. thanks for starting this up. This website is one thing that's needed on the
internet, someone with some originality!
Here is my website - hookah lounge Orlando
What's up Dear, are you genuinely visiting this web site daily, if so afterward you will definitely take fastidious knowledge.
Feel free to visit my web blog ... free xxx porn movies
nike air max 95
golden goose outlet
golden goose sneakers
air max 2019
hermes handbags bag
christian louboutin shoes
nmd
moncler
yeezy boost
air max 2019
steph curry shoes
off white outlet
giannis antetokounmpo shoes
yeezy boost
off white x nike
yeezy boost 350
kevin durant shoes
supreme outlet
kyrie irving shoes
yeezy shoes
Post a Comment